Cleaning your baby’s ears is an important part of their overall hygiene routine. Proper techniques for cleaning your baby’s ears are essential to ensure their ears remain clean and free from any discomfort or potential infections.
In this article, we will discuss the appropriate methods to clean your baby’s ears, along with some important tips and precautions to keep in mind.
Why is it important to clean your baby’s ears?
Cleaning your baby’s ears helps to prevent the buildup of wax, dirt, or other debris, which can lead to discomfort or even infections.
Keeping their ears clean also aids in maintaining good hearing health and reduces the risk of any potential hearing problems.
When should you clean your baby’s ears?
It is important to note that your baby’s ears are delicate and self-cleaning, which means you don’t need to clean them every day. Excessive cleaning can disrupt the natural balance and cause irritation or injury.
However, there are certain situations when cleaning is necessary:.
1. Visible dirt or buildup
If you notice visible dirt or wax buildup in your baby’s ears, it is a good indication that it’s time for a gentle cleaning.
2. Earwax blockage
When earwax accumulates and forms a blockage, it can cause discomfort, reduced hearing, or even ear infections. In such cases, it becomes necessary to clean your baby’s ears carefully.
3. Following doctor’s instructions
If your doctor has recommended regular ear cleaning for medical reasons or specific conditions, it is important to follow their instructions carefully.
Tools for cleaning your baby’s ears
When it comes to cleaning your baby’s ears, it is crucial to use the right tools to avoid any harm or injury. Here are the recommended tools for cleaning your baby’s ears:.
1. Washcloth or cotton ball
A soft washcloth or cotton ball is ideal for gentle wiping of the outer portion of your baby’s ears. Make sure the cloth or cotton ball is clean and free from any harsh chemicals or irritants.
2. Baby-safe earwax removal solution
If your baby has excessive wax buildup, you may need to use a baby-safe earwax removal solution. Consult your pediatrician for specific recommendations and proper usage instructions.
Proper techniques for cleaning your baby’s ears
Follow these steps to clean your baby’s ears safely and effectively:.
1. Preparation
Start by washing your hands thoroughly with soap and warm water to ensure cleanliness. Gather all the necessary tools, including a clean washcloth or cotton ball, and the recommended earwax removal solution (if needed).
2. Create a comfortable environment
Choose a quiet and well-lit room where you can comfortably clean your baby’s ears. You may want to lay your baby down on a soft surface, such as a changing table, or hold them securely in your arms.
3. Gently wipe the outer ear
Take a clean washcloth or cotton ball and dampen it with warm water. Gently wipe the outer portion of your baby’s ear, including the curved area behind the ear and the earlobe.
Avoid inserting the cloth or cotton ball into the ear canal to prevent any damage to the eardrum.
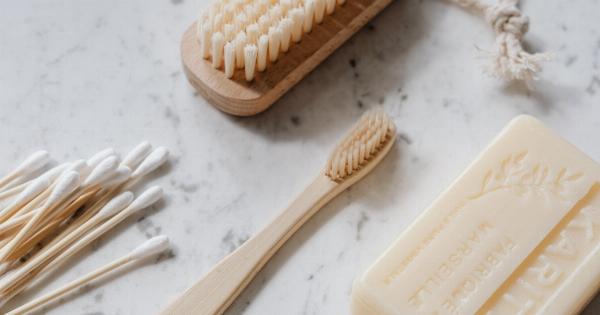
4. Avoid using cotton swabs or any sharp objects
It is crucial to remember that you should never insert cotton swabs, bobby pins, or any other sharp objects into your baby’s ears. This can push the wax deeper into the ear canal and increase the risk of injury.
5. Use earwax removal solution (if necessary)
If your pediatrician has recommended using an earwax removal solution, follow their instructions carefully. Typically, you would need to place a few drops of the solution into your baby’s ear while they are lying down.
Allow the solution to sit for a few minutes to soften the wax.
6. Gently clean the ear canal
After applying the earwax removal solution, gently wipe the outer portion of the ear with a clean washcloth or cotton ball. You can also use a bulb syringe or ear bulb (available at most pharmacies) to flush out the softened wax using warm water.
Again, avoid inserting the syringe or bulb deeply into the ear canal.
7. Dry the ears carefully
After cleaning, make sure to dry your baby’s ears thoroughly with a clean, dry washcloth or towel. Moisture can increase the risk of infections, so ensure the ears are completely dry before moving on.
Important tips and precautions
Here are some additional tips and precautions to keep in mind when cleaning your baby’s ears:.
1. Avoid excessive cleaning
As mentioned earlier, your baby’s ears are self-cleaning, and excessive cleaning can lead to irritation or injury. Stick to cleaning when necessary, such as in cases of visible dirt or earwax blockage.
2. Consult a pediatrician
If you are unsure about how to clean your baby’s ears or notice any persistent ear problems, it is best to consult your pediatrician. They can provide guidance specific to your baby’s needs and overall health.
3. Be gentle
Always handle your baby’s ears with utmost care and be gentle during the cleaning process. Avoid any aggressive or forceful movements that can potentially harm their delicate ears.
4. Monitor for signs of infection
After cleaning your baby’s ears, keep an eye out for any signs of infection, such as increased redness, swelling, discharge, or persistent discomfort. If you notice any concerning symptoms, consult a healthcare professional immediately.
Conclusion
Proper techniques for cleaning your baby’s ears include gentle wiping of the outer ear, avoiding sharp objects, and using earwax removal solutions when necessary.
Remember to be cautious, consult a pediatrician if needed, and monitor for any signs of infection. By following these guidelines, you can effectively and safely maintain your baby’s ear hygiene and promote their overall ear health.
