There’s nothing more frustrating than breaking your favorite makeup product, especially when you’ve invested a good amount of money in it. But don’t worry – all hope is not lost.
With a few simple tricks, you can revive your broken makeup products and enjoy them once again. Whether it’s a shattered compact, a dried-out mascara, or a broken lipstick, we’ve got you covered. Read on to discover how to give a second life to your beloved makeup items.
1. Fixing a Shattered Compact
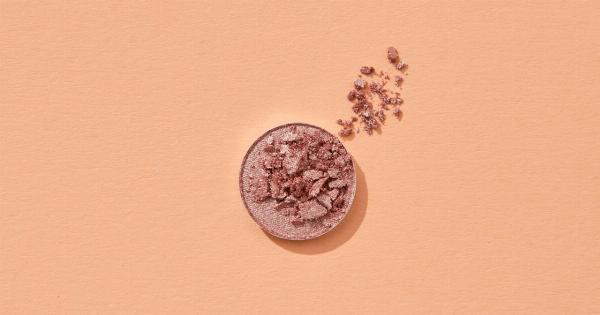
Shattering a compact is a common makeup mishap, but fear not! You can easily restore it back to its original state. Here’s how:.
• Gather all the broken pieces and place them on a clean tissue or paper towel.
• Crush the broken pieces into a fine powder using a spoon or any other blunt object.
• Add a few drops of rubbing alcohol to the crushed powder and mix it thoroughly to create a paste-like consistency.
• Carefully transfer the mixture back into the original compact and smooth it out using a spoon or the back of a butter knife.
• Leave the compact open for a few hours to let the alcohol evaporate and the product set back into its solid form.
2. Rescuing a Dried-out Mascara
There’s nothing worse than a dried-out mascara ruining your perfectly planned makeup look. Fortunately, you can revive it with a simple trick. Follow these steps:.
• Take the dried-out mascara tube and close it tightly.
• Place the closed tube in a cup or container filled with warm water.
• Let it sit in the warm water bath for a few minutes to help soften the product.
• Remove the mascara tube from the water and give it a gentle shake.
• Open the tube and check if the consistency has improved. If needed, repeat the process until you achieve the desired texture.
• Remember to replace your mascaras every three to six months to avoid any potential eye infections.
3. Fixing a Broken Lipstick
Breaking a lipstick may seem catastrophic, but it’s actually quite easy to salvage. Here’s what you need to do:.
• Place the broken parts of the lipstick on a clean tissue or paper towel.
• Use a lighter or a match to gently melt the broken ends of the lipstick.
• Press the melted ends together, ensuring they fuse back into one piece.
• Smooth out any visible cracks or imperfections with your finger or a clean brush.
• For stability, place the repaired lipstick in the refrigerator for about 15 minutes.
• Voila! Your lipstick is ready to use again.
4. Restoring Dried Cream Products
Cream-based makeup products like foundations, concealers, or cream blushes can dry out over time, making them difficult to use. But don’t worry, there’s a quick fix:.
• Scoop out the dried-out cream product from its container into a clean mixing palette or a small bowl.
• Add a few drops of facial oil, toner, or moisturizer to the dried-out product.
• Mix the contents thoroughly until the consistency becomes smooth and creamy again.
• Transfer the revived product back into its original container using a clean spatula or a small spoon.
• Enjoy using your rehydrated cream makeup product once again.
5. Salvaging a Clumpy Nail Polish
Clumpy nail polish can ruin the perfect DIY manicure, but fret not. Follow these simple steps to restore its smoothness:.
• Roll the nail polish bottle between your hands vigorously to loosen up the clumps.
• If clumps persist, add a few drops of nail polish thinner to the bottle and mix it well.
• Avoid using nail polish remover as it can alter the formula and affect its performance.
• Close the bottle tightly and shake it gently to ensure all the ingredients are thoroughly combined.
• Your nail polish is now ready to be used for a flawless manicure.
6. Fixing a Bent Makeup Brush
Accidentally bending the bristles of your makeup brush can leave them misshapen and inconvenient for application, but here’s how you can fix them:.
• Dampen the bristles with warm water to make them more pliable.
• Gently reshape the bristles by using your fingers to mold them back into their original form.
• Lay the brush flat on a clean towel or tissue to dry, ensuring the bristles maintain their desired shape.
• Once dry, your makeup brush will be ready to use again.
7. Rehydrating a Dry Eyeliner Pencil
A dry eyeliner pencil can tug harshly on your delicate eyelids, resulting in an uneven application. Try these tips to soften it up:.
• Roll the eyeliner pencil between your hands to generate warmth and soften the product.
• If rolling doesn’t yield satisfactory results, place the pencil tip under a stream of hot running water for a few seconds.
• Avoid exposing the entire pencil to water, as it may cause damage.
• Always gently pat the pencil dry after rehydrating before using it to prevent smudging.
8. Restoring a Broken Eyeshadow
Discovering a broken eyeshadow palette can feel devastating, but don’t give up just yet. Follow these steps to bring it back to life:.
• Crush the broken pieces of the eyeshadow into a fine powder using the back of a spoon or a clean brush.
• Add a few drops of rubbing alcohol to the crushed eyeshadow and mix it together until it forms a paste-like consistency.
• Carefully transfer the mixture back into the original eyeshadow pan, ensuring it fills the empty spaces.
• Leave the eyeshadow palette open for a few hours to allow the alcohol to evaporate, leaving you with a revived product.
9. Refreshing a Clumpy Liquid Foundation
There’s nothing worse than applying clumpy liquid foundation that won’t blend seamlessly into your skin. Follow these steps to revive it:.
• Shake the foundation bottle vigorously to loosen the clumps.
• If the clumping persists, add a drop or two of your favorite moisturizer or facial oil to the foundation.
• Mix the foundation and moisturizer/oil thoroughly until the consistency becomes smooth and even.
• Your liquid foundation is now ready to provide flawless coverage.
10. Reviving a Dried-out Gel Eyeliner
Gel eyeliners can dry out over time, making them difficult to apply. However, with a simple trick, you can restore their creamy texture:.
• Use a clean eyeliner brush to scrape off the top layer of the dried-out gel eyeliner.
• Mix the scraped gel with a few drops of eye makeup remover or any facial oil.
• Blend the mixture well until it becomes smooth and creamy.
• Your gel eyeliner is now ready to glide effortlessly along your lash line.
